How to Build a Telegram Bot Using Typescript & Node.js
Introduction
In this tutorial, you’ll learn all the steps that go into building a dead-simple Telegram bot and hosting it on the cloud. It will greet people and apply FANCY text effects.
You’ll be writing code using the Typescript language and running it on the Node.js server environment.
And seeing as Telegram bots are built on an HTTP-based API, you’ll be using the GrammY framework for higher-level abstractions and a better programming experience.
Prerequisites
Before writing any code, make sure to have the following programs installed on your computer:
- Telegram client.
- Node.js v14+, NPM v6+, and cURL.
- VS Code, or any other IDE of choice.
You’ll be using Cyclic to host this project on the cloud, so make sure to take advantage of the Free Forever tier.
And while you don’t have to be an expert in it, you should know a bit of Typescript. You’ll be using it to write all the code in this tutorial.
Setup the Project
Downloading the starter files Start-up this project by cloning the final version into your computer:
git clone https://github.com/eludadev/telegram-bot.git
cd telegram-bot
And make sure to roll it back to its very first stage, so you can learn how to build the rest of it in this tutorial:
git reset --hard 3ea99a5e111e84da4825b0732d76c386b5c8fdda
After that’s done, install the project’s dependencies:
npm install
Getting your Telegram bot API token
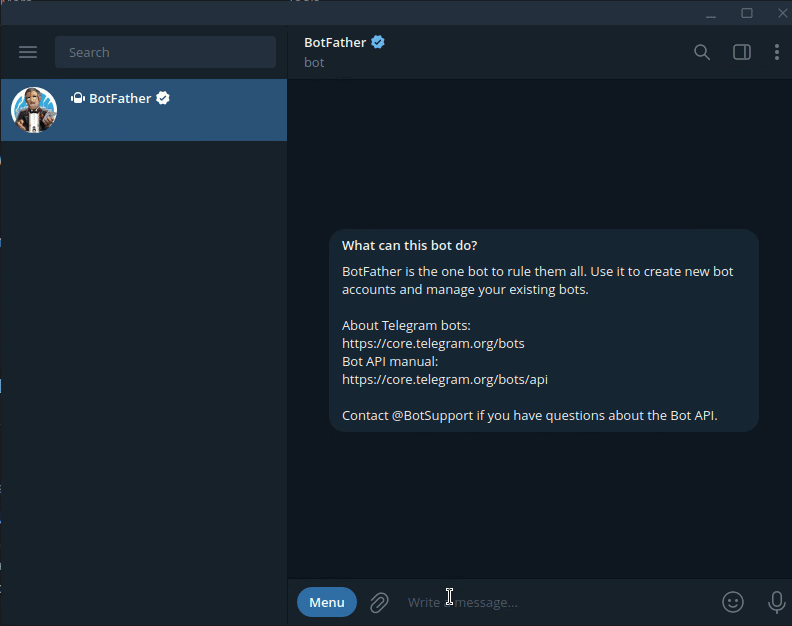
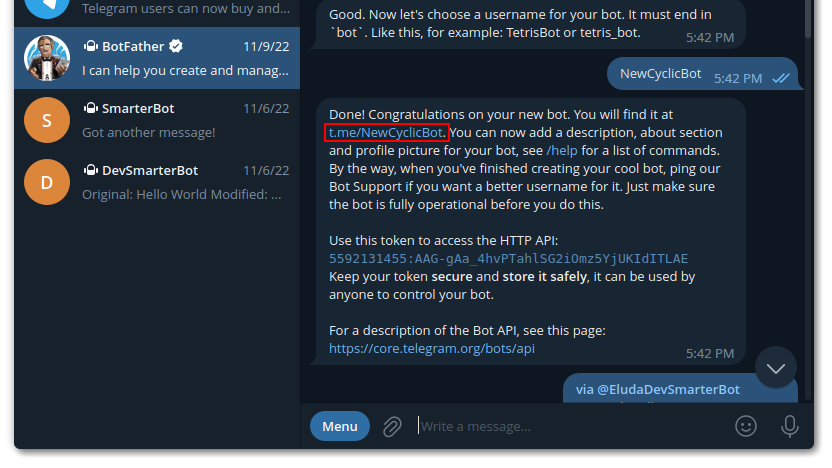
Using the Telegram client, start a conversation with the @BotFather.
Send it the following messages:
- /newbot
- Your bot name
- Your bot username (can’t contain spaces and must end in “bot”)
After that, create a new file in the project’s root directory called .env. Paste the following line into that file, replacing <YOUR-API-TOKEN> with your bot’s API token that you just got from the last message with @BotFather.
TELEGRAM_TOKEN=<YOUR-API-TOKEN>
Initializing the Telegram bot
Create a new file called bot.ts in the src/ directory. That’s where you’ll be writing code for the rest of this tutorial.
You’ll be using the GrammY framework to build this bot; it’s much easier this way instead of interacting directly with the API routes.
Head into the bot script and import the library in question:
import { Bot } from "grammy";

// Create a bot using the Telegram token
const bot = new Bot(process.env.TELEGRAM_TOKEN || "");
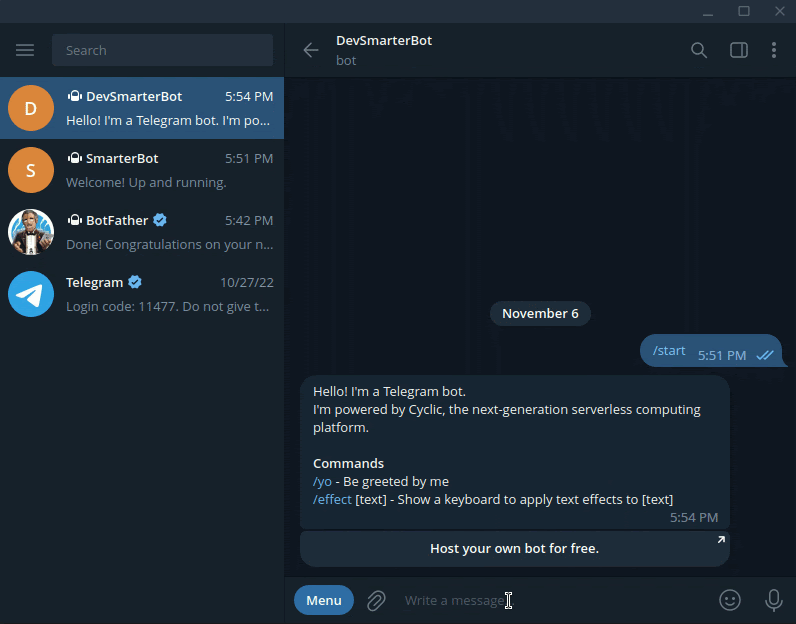
As you can see, the bot is created with the TELEGRAM_TOKEN variable that you just set in the .env file. After that, handle all message events by responding with a friendly robot introduction:
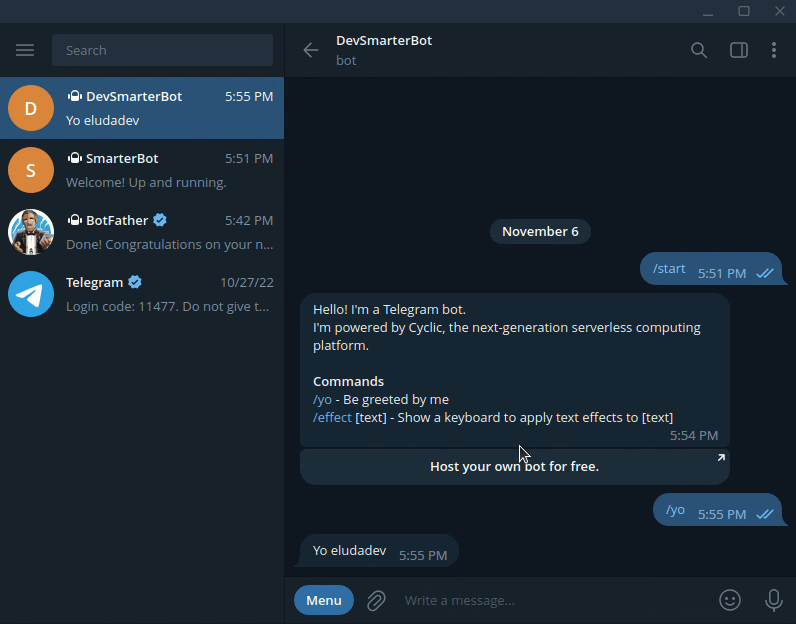
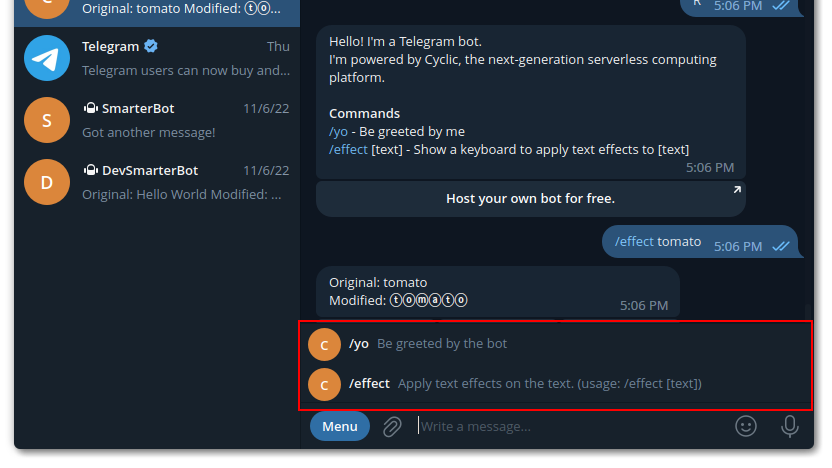
const introductionMessage = `Hello! I'm a Telegram bot.
I'm powered by Cyclic, the next-generation serverless computing platform.

<b>Commands</b>
/yo - Be greeted by me
/effect [text] - Show a keyboard to apply text effects to [text]`;

const replyWithIntro = (ctx: any) =>
  ctx.reply(introductionMessage, {
    parse_mode: "HTML",
  });

bot.on("message", replyWithIntro);
Take note of the parse_mode parameter. It’s used to allow HTML tags in the message response, such as <b>Commands</b>.
And finally, start-up the bot by running one method:
bot.start()
Follow that by executing the bot script:
npm run dev
And boom! You’ve got yourself a dead-simple bot running on your computer. You can test-it out by sending it a message on Telegram; you may want to follow the link previously given to you by @BotFather.
Handle basic commands
 Telegram bots can handle commands, which aren’t much different from ordinary messages. The syntax for such interactions follows the following format:
bot.command("start", replyWithIntro);
Test it out by sending the /start message to your bot. Note that your program is automatically updated once you modify the bot script.
After that’s done, modify your bot to handle the /yo command. It will simply respond with the username of the sender:
// Handle the /yo command to greet the user
bot.command("yo", (ctx) => ctx.reply(`Yo ${ctx.from?.username}`));
And since the bot.on(“message”) event handler is on top, it will catch all messages and the /start and /yo commands won’t have an effect. Please make sure to always keep it at the bottom of the file:
// Keep this at the bottom of the file
bot.on("message", replyWithIntro);
Build Inline Keyboards
Telegram bots can also respond with a set of buttons underneath the message. Let’s do a simple demonstration. Change the introductory response to also contain a button that links users to the Cyclic website, the platform that we’ll use to deploy our bot to the cloud for free at the end of this tutorial:
import { InlineKeyboard } from "grammy";

const aboutUrlKeyboard = new InlineKeyboard().url(
  "Host your own bot for free.",
  "https://cyclic.sh/"
);

const replyWithIntro = (ctx: any) =>
  ctx.reply(introductionMessage, {
    reply_markup: aboutUrlKeyboard,
    parse_mode: "HTML",
  });
After this step, you may want to re-execute the bot script after interrupting it with the Ctrl+C keyboard combination:
npm run dev
A more advanced example
 Let’s now do a more advanced example. Other inline keyboards may contain general buttons, whose actions can be handled to the furthest extent.
Handle the
Let’s now do a more advanced example. Other inline keyboards may contain general buttons, whose actions can be handled to the furthest extent.
Handle the /effectcommand, and make it apply bold, italic, and a bunch more effects to text:
import { chunk } from "lodash";
import { applyTextEffect, Variant } from "./textEffects";

import type { Variant as TextEffectVariant } from "./textEffects";

type Effect = { code: TextEffectVariant; label: string };
const allEffects: Effect[] = [
  {
    code: "w",
    label: "Monospace",
  },
  {
    code: "b",
    label: "Bold",
  },
  {
    code: "i",
    label: "Italic",
  },
  {
    code: "d",
    label: "Doublestruck",
  },
  {
    code: "o",
    label: "Circled",
  },
  {
    code: "q",
    label: "Squared",
  },
];

const effectCallbackCodeAccessor = (effectCode: TextEffectVariant) =>
  `effect-${effectCode}`;

const effectsKeyboardAccessor = (effectCodes: string[]) => {
  const effectsAccessor = (effectCodes: string[]) =>
    effectCodes.map((code) =>
      allEffects.find((effect) => effect.code === code)
    );
  const effects = effectsAccessor(effectCodes);

  const keyboard = new InlineKeyboard();
  const chunkedEffects = chunk(effects, 3);
  for (const effectsChunk of chunkedEffects) {
    for (const effect of effectsChunk) {
      effect &&
        keyboard.text(effect.label, effectCallbackCodeAccessor(effect.code));
    }
    keyboard.row();
  }

  return keyboard;
};

const textEffectResponseAccessor = (
  originalText: string,
  modifiedText?: string
) =>
  `Original: ${originalText}` +
  (modifiedText ? `\nModified: ${modifiedText}` : "");

const parseTextEffectResponse = (
  response: string
): {
  originalText: string;
  modifiedText?: string;
} => {
  const originalText = (response.match(/Original: (.*)/) as any)[1];
  const modifiedTextMatch = response.match(/Modified: (.*)/);

  let modifiedText;
  if (modifiedTextMatch) modifiedText = modifiedTextMatch[1];

  if (!modifiedTextMatch) return { originalText };
  else return { originalText, modifiedText };
};

// Handle the /effect command to apply text effects using an inline keyboard
bot.command("effect", (ctx) =>
  ctx.reply(textEffectResponseAccessor(ctx.match), {
    reply_markup: effectsKeyboardAccessor(
      allEffects.map((effect) => effect.code)
    ),
  })
);

// Handle text effects from the effect keyboard
for (const effect of allEffects) {
  const allEffectCodes = allEffects.map((effect) => effect.code);

  bot.callbackQuery(effectCallbackCodeAccessor(effect.code), async (ctx) => {
    const { originalText } = parseTextEffectResponse(ctx.msg?.text || "");
    const modifiedText = applyTextEffect(originalText, effect.code);

    await ctx.editMessageText(
      textEffectResponseAccessor(originalText, modifiedText),
      {
        reply_markup: effectsKeyboardAccessor(
          allEffectCodes.filter((code) => code !== effect.code)
        ),
      }
    );
  });
}
Handle Inline Queries
Telegram bots support inline queries, a feature which enables them to be invoked from any chat within Telegram by calling them with their “@” username. Let’s use this to allow users to apply text effects in any conversation using your bot.
Enabling inline mode for your Telegram bot

By default, this feature comes disabled. Contact @BotFather to enable it:
- /mybots
- Select your bot from the inline keyboard
- Bot settings
- Inline mode
- Turn on
Handling the “effect” inline query Inline queries are generally handled by matching a RegEx pattern. We’ll listen for the “effect [effect] [text]” query and handle it by applying [effect] to [text]:
const queryRegEx = /effect (monospace|bold|italic) (.*)/;
bot.inlineQuery(queryRegEx, async (ctx) => {
  const fullQuery = ctx.inlineQuery.query;
  const fullQueryMatch = fullQuery.match(queryRegEx);
  if (!fullQueryMatch) return;

  const effectLabel = fullQueryMatch[1];
  const originalText = fullQueryMatch[2];

  const effectCode = allEffects.find(
    (effect) => effect.label.toLowerCase() === effectLabel.toLowerCase()
  )?.code;
  const modifiedText = applyTextEffect(originalText, effectCode as Variant);

  await ctx.answerInlineQuery(
    [
      {
        type: "article",
        id: "text-effect",
        title: "Text Effects",
        input_message_content: {
          message_text: `Original: ${originalText}
Modified: ${modifiedText}`,
          parse_mode: "HTML",
        },
        reply_markup: new InlineKeyboard().switchInline("Share", fullQuery),
        url: "http://t.me/EludaDevSmarterBot",
        description: "Create stylish Unicode text, all within Telegram.",
      },
    ],
    { cache_time: 30 * 24 * 3600 } // one month in seconds
  );
});
Polish the Telegram Bot
It’s often useful for Telegram bots to display a list of supported commands, and while we’re already doing that in the introductory message, there’s a more formal way of doing so, and it’s as simple as one command:
// Suggest commands in the menu
bot.api.setMyCommands([
  { command: "yo", description: "Be greeted by the bot" },
  {
    command: "effect",
    description: "Apply text effects on the text. (usage: /effect [text])",
  },
]);
Note that to see the new menu, you must restart your Telegram client.
Furthermore, professional bots come with a profile picture and a well-formed description. You can do all of that by contacting @BotFather:
- Edit bot
- Edit about / Edit description / Edit botpic
Deploy the Telegram Bot to the Cloud
Long Polling vs Webhooks
There are two fundamentally different ways of deploying your Telegram bot to the web.
The first one is Long Polling, and we’ve already been using it in this tutorial by running bot.start(). With it, bots constantly send requests to the Telegram servers checking for new messages, and responding to them accordingly.
This approach is not compatible with the serverless architecture, as the latter expects applications to only run once, and only on-demand.
“Serverless means applications are only on for the time it takes to process individual requests. They are suspended immediately after each response is sent.” — Cyclic docs.
The solution to this problem is deployment by Webhooks, an alternative strategy that makes the Telegram client itself contact your bot when there’s a new message. And while this comes with its own drawbacks, it’s fully compatible with serverless architecture.
Using Webhooks for deployment
By following the NODE_ENV environment variable, we can tell whether the bot instance is running in a development or a production stage. Replace the bot.start() command with the following:
import { webhookCallback } from "grammy";
import express from "express";

// Start the server
if (process.env.NODE_ENV === "production") {
  // Use Webhooks for the production server
  const app = express();
  app.use(express.json());
  app.use(webhookCallback(bot, "express"));

  const PORT = process.env.PORT || 3000;
  app.listen(PORT, () => {
    console.log(`Bot listening on port ${PORT}`);
  });
} else {
  // Use Long Polling for development
  bot.start();
}
Pushing all files to a Github Repository
It’s imperative that we use a Github repository to store our bot files so we can deploy it to the cloud. After creating a new repository (either public or private), run the following commands to link it with your local Git instance, replacing <YOUR-GH-REPO-LINK> with your repo’s URL:
export GH_REPO="<YOUR-GH-REPO-LINK>"
git remote remove origin
git remote add origin "$GH_REPO.git"
After that, stage, commit, and push your files to the new remote origin:
git add .
git commit -m "Build the Telegram bot."
git branch -M main
git push origin main
Deploying for free using Cyclic
After creating your Cyclic account, use it to deploy your new Telegram bot. It’s free forever, and no credit card is required.
Note that you must sign up using the same Github account that you used to create your bot’s repository.
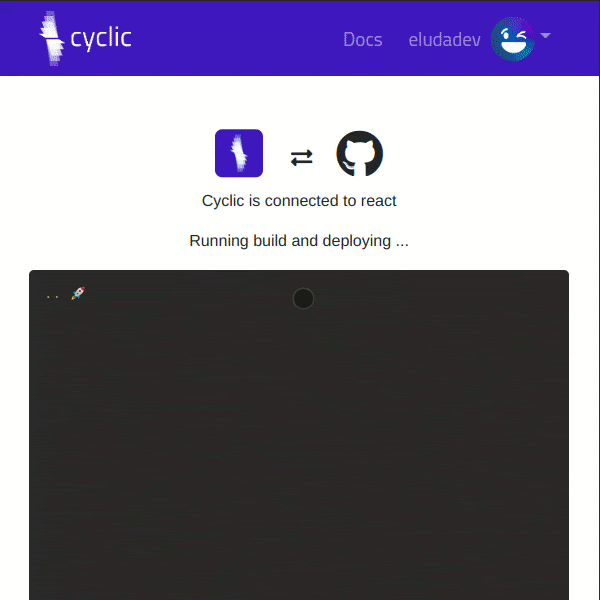
Open your Cyclic dashboard, click on the Deploy button and switch to the “Link your own” tab. Search for your bot’s repo and click on the “Connect” button. Then sit back and watch it do all the work for you!
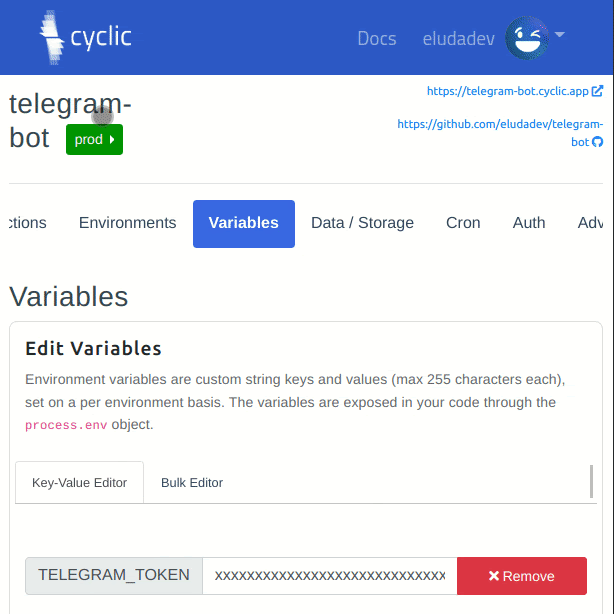
The final step is setting the same environment variables as you did in the .env file. Open your Cyclic deployment’s dashboard page, switch to the Variables page and set the appropriate values for the environment variables:
- NODE_ENV: production
- TELEGRAM_TOKEN: your bot’s API token (same as
.envfile)
Connecting your Telegram bot to your Cyclic server
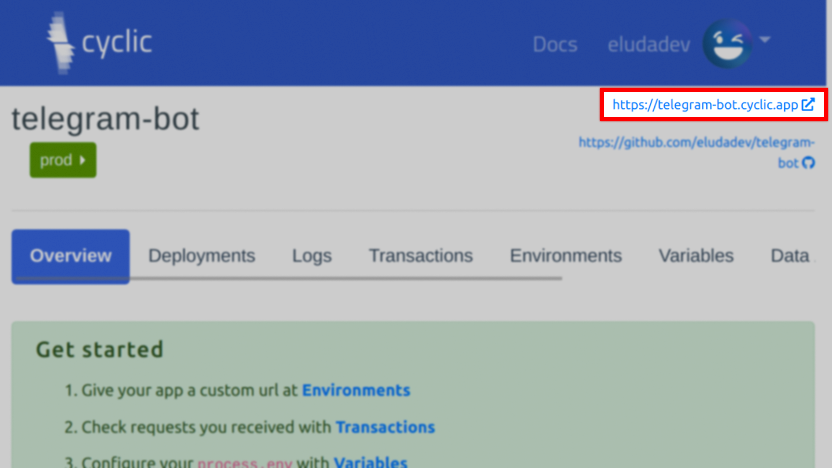
You want to tell Telegram to send the Webhook requests to your Cyclic server. So conclude this project by copying your Cyclic deployment’s URL and running these commands:
export TELEGRAM_API_TOKEN=... # YOUR TELEGRAM API TOKEN
export TELEGRAM_WEBHOOK_URL=... # YOUR CYCLIC DEPLOYMENT URL

curl "https://api.telegram.org/bot$TELEGRAM_API_TOKEN/setWebhook?url=$TELEGRAM_WEBHOOK_URL"
And boom! Your bot’s now actively running on the cloud! You may stop your local development instance by pressing Ctrl+C and notice how your bot is still working.
Conclusion
You’ve successfully reached the end of this tutorial! There are many more things you could add to this bot, including but not limited to games, error handling and internationalization.
You may also want to learn more about Telegram bots:
- https://grammy.dev/guide/inline-queries.html
- https://grammy.dev/plugins/keyboard.html
- https://grammy.dev/guide/deployment-types.html
And here are some resources to advance your knowledge about serverless computing:
Subscribe to posts
Enter your email If you would like to get an email the next time we post.
We post about ~1-2x per month, and up to once a month about company news.
Launch a hello world
Fork and deploy a hello world project onto Cyclic faster than it has taken to read this page. Experience the power.
Deploy on Cyclic 🚀